
A savvy person will understand that if you're aiming to put in a green roof, you've got to have a railing in place so you and your buddies don't tumble off. I got the steel for this project in April, and it took me until August to complete.
If anyone is interested in the design process, let me know, and I'll make a page for that. But this page is to document the construction process.
First, I got a pile of steel. The delivery truck driver asked where all my guys were to handle the unloading, but after I assured him it was just me, he got out and helped me pull the steel off the truck and leave it in the street - parallel to the parked cars. I then fed each piece over the front fence and through the middle window of the basement. It's 1/2" square steel tubing and 1/4" pencil rod. It's hard to believe that pile of sticks is going to turn into a fence.

The first step was to make paper patterns of each upright. I had marked out where the railings would go up on the roof with sharpie and chalk line, so I made templates on scrap paper by copying the shapes directly off of the roof markings. I numbered each one, so if there were small variations in angle from one to the next, I wouldn't cause problems later in the process by mixing them up. Then I cut to size the square tubing and laid each piece on the paper templates. I don't have a horizontal band saw, cold saw, or cut-off saw to ensure square or perfectly mitered cuts, so I refined everything with a hand file.


I also don't have a proper welding table, but I did have some scrap aluminum, so I used the aluminum and a framing square to make sure my square corners were square as I welded them. That's a Lincoln Weld-Pak 100 with flux cored wire, in case you're curious.

Me in my welding helmet. My best friend, Bernadette, calls this my "serial killer look."

I had to cut a lot of uniform-length pieces for the legs of the uprights. I made a stop block at the end of my work table, and I drew a line on the table at which I aimed my porta-band, and I used my f-style clamps to keep the long uncut steel in place on my little aluminum sawing bed.

All it took was time and tenacity. Here's the pile of cut legs growing.

Cindy came downstairs and took a couple of pictures of my operation.


And here's my sweet Milwaukee cordless porta-band. All that practice meant I got pretty good at keeping my cuts square.

I didn't take any shots of the steps leading up to this point. But I basically just welded long legs to each corner of the tops I'd already made. Then, I welded cross-members a few inches up from the bottoms of the legs (measured by the space between the legs at the top). And then welded in the intermediary pieces. I continued to use my framing square set up to make sure things stayed true throughout.

Here are the first three finished.

And then there were 10.

After the uprights were finished, I turned my attention to the lattice panels. I wasn't exactly sure what I was doing when I started, but I took my inspiration from this work of Andy Goldsworthy's, and quickly discovered three rules: the pencil rod "twigs" had to be given a couple of shallow bends in order to give the piece an organic feel; they couldn't be straight. Second, they were more successful if they were arranged with occasional pairs or trios in parallel. And Third, no more than two rods could intersect at any single point.
The city also required that no gap in the railing be larger than 4" in diameter. I made a little card board circle, just under 4", to test each space.
First the bending. I put them across this log and sort of leaned on them one by one.

Then the layout.

Then weld every spot where two rods crossed each other. There was a water bottle just out of frame, so I could keep things under control when my work table caught fire. Now that I write that out, I think it sounds more dangerous than it felt at the time...
Anyway, the masking tape lines on the left side of this photo were my marks for how big to build each panel. They were all oversized by an inch in each direction.

Then flip the piece over, raise it up on scrap aluminum (to save my work table as much as possible), and weld all the intersections on the other side.

Each lattice panel took about 5 hours to make. This is me with the first one done.

Something about that facial expression made me think of this photo of me in Ginger-the-Dog's dog house... circa 1974. No?

Anyway, I made a bunch more lattice panels as the weekends rolled by, and as I got more done, I started setting them in the uprights to get a visual of what the whole thing was going to look like when it was done. I was pretty happy with it, but it was hard to get a good shot with such a busy (cluttered) background.


An interloper in her pajamas...

Eventually, it came time to bring everything up to the roof and start priming and painting the pieces. In case you're curious, none of the sections are very heavy. I designed it that way, because I wanted all the weight capacity to be going to the green roof, and not the railings. I hauled each section to the roof on a rope, hand over hand, being careful not to let anything swing into one of the window screens or power lines below.
I don't know why I bothered with the tarp... but the sky was nice and dramatic. Ignore the tarp. Look at the sky!

Each lattice panel takes a couple of hours to paint, because of all the little crannies. Here are the back pieces completed.

And here are the front pieces.

And now we come to the point of putting it all together. I hired the guys who did the work on the roof (to stop it from leaking, move the access hatch out of the upstairs apartment's closet, re-build the chimney and West parapet wall, and add insulation and a new rubber roofing membrane) to come and install 2" wide by 1/4" thick steel straps along the path the railings would take.
These are the straps as I was laying them out and cutting them to length along the back of the house.

I had to block them up to keep from melting the roof membrane while I welded them, and I was careful to maintain their correct positions and angles so they would follow the complex contours of the roof.

Here's Cindy and one of the roofing guys taking a break and trying to stay hydrated as the silver roof reflected sunlight up at us.

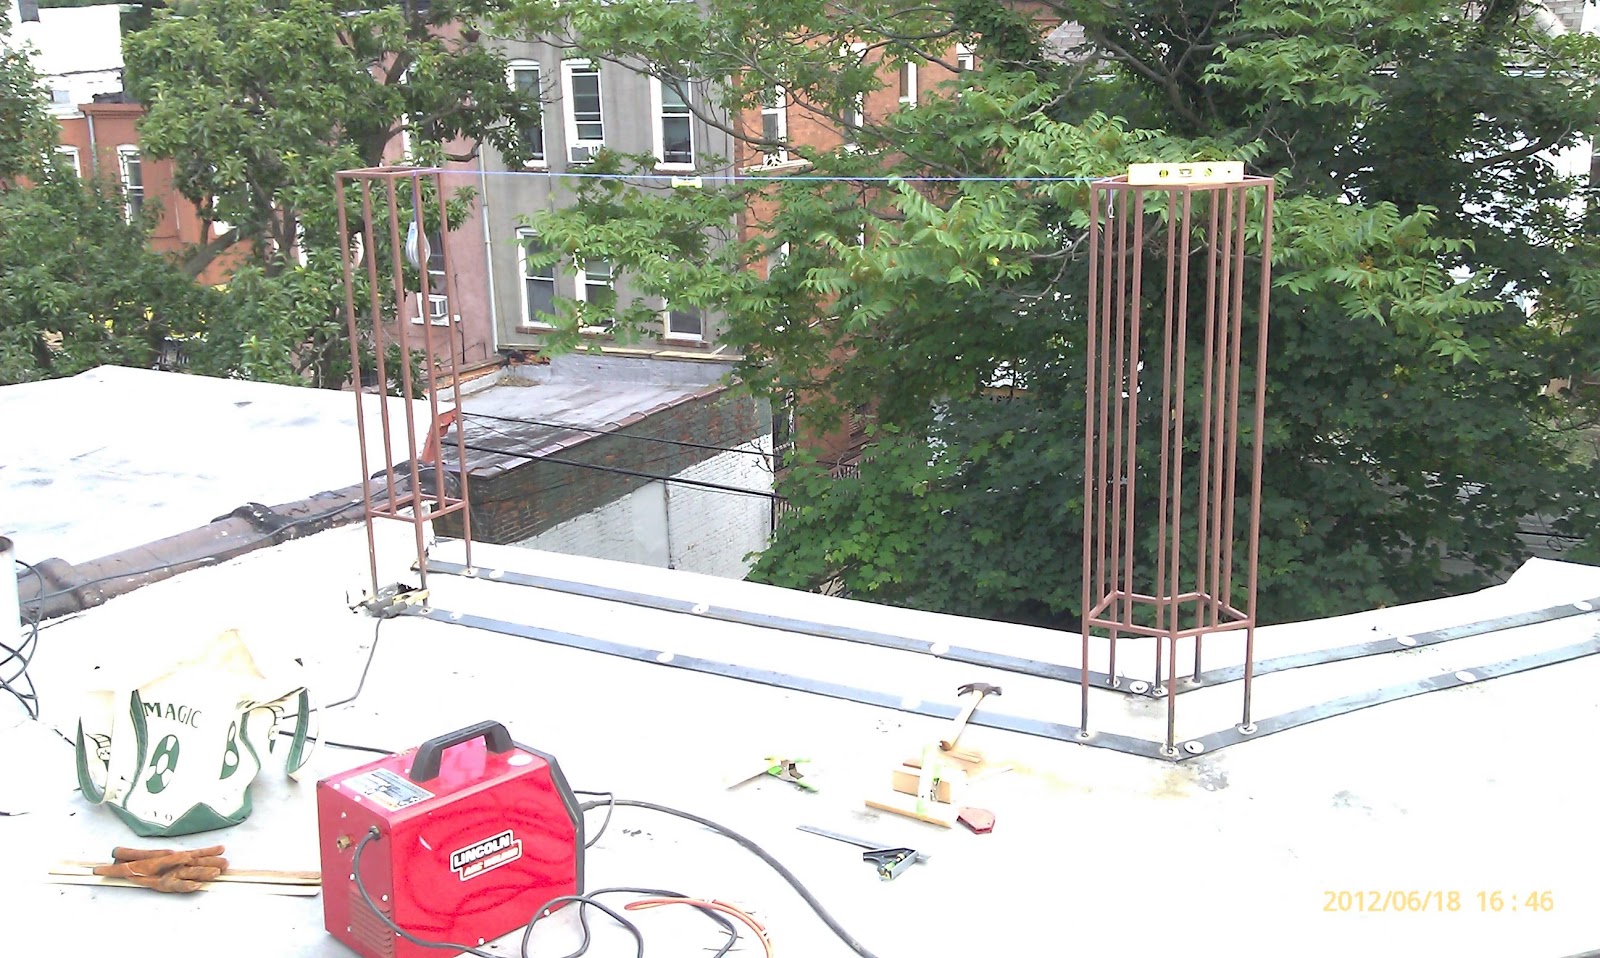
Once I had all the pieces cut and welded, they were bolted to the roof by the roofing guys. And here's the first upright, ready to get cut to match the pitch of the roof and welded into place.

The roofing guys didn't seem confident my method of cutting the legs would leave me with a plumb upright. I learned my shit in theatre! Who's laughing now, boys?!

Two down. Plumb and level.
A spy!

And this is my first glimpse of what the railing will look like "in situ", so to speak. I was pleased and relieved.

My next task was to cut little "feet" to weld to the bottoms of all the uprights' legs. I was afraid if left alone, the steel in the legs would be too thin and the welds wouldn't hold over time.
Hello, Porta-Band... haven't seen you in a while.

Then back up to the roof to install the front uprights. Cindy has the pigeon owl keeping a watchful eye.

Did I mention it was really bright up there? That's my hat.

Once all the uprights were cut and welded into place, and all their feet were also welded on, I cut horizontal pieces to span them, and clamped the lattice panels into place. I then cut the excess off the lattice panels, a few twigs at a time and welded them to the horizontal and vertical framing pieces.

Cindy talked me into getting prescription sun glasses. It was so bright, I kept them on, even while I was welding.

And here are my first views of the assembled railing along the front of the house.


Around this time, we replaced the skylight, which was leaking. The new skylight also leaked (we then repaired it), and I'm too embarrassed by the miserable state of the plaster ceilings below. So I won't show you that here.

Instead, here's picture of the back railing coming together. While they were here for the skylight, the roofing guys also covered the steel straps with more roofing rubber, so that no water can get down the bolt holes they made when they attached the straps. So far, it's worked (knock wood. are you knocking? I said knock. thank you.)


Here's my first view from the back yard. Cindy had to come and swat the mosquitoes off my legs while I took this picture. That's an excellent reason to escape to the roof when we need outdoor time; ground level around here is positively infested with the Asian Tiger Mosquito. They are among the top 3 things that give me murderous thoughts.

And, last-but-not-leastly, although I said I wasn't going to spend space talking about design here, these are a couple of ideas for the wooden handrails that will go along the tops of both the front and back railing. Neither of these are exactly what I've decided to go with, but I'm showing them to you anyway.


And here is the lumber I'm going to use! It's reclaimed boardwalk lumber from the Rockaway Boardwalk, destroyed in Superstorm Sandy, and reclaimed by Sawkill Lumber.

And that's basically where the railing project stands! I've still got the handrails to make and put up, but my focus then turned to installing the green roof.
The best intentions are only backed up by the sturdiest resolve. In your green roof's case, its in those grafts and railings that you will build, so that they can withstand all pressures to do their job. However, the menial things are also fine, such as gutters, with which to draw out the rain water and keep it from building up pressures at the salient points of your latest project. Good luck!
ReplyDeleteMeghan Bowers @ GutterDome
i saw a related post on InsideReviewed
ReplyDeleteAre you, perhaps, a robot telling a fib?
ReplyDelete